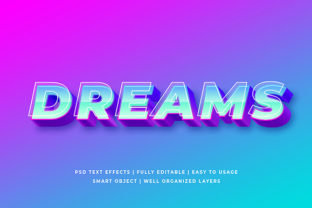
Dreams - Colorful 3D Text Effect Mockup
If you’ve ever spent hours layering shadows, gradients, and extrusions in Photoshop—only to end up with flat-looking text that doesn’t pop—the Dreams - Colorful 3D Text Effect Mockup might be exactly what you need. It’s not just another overlay or filter. This is a professionally crafted, layered PSD file designed to place your custom typography into a vibrant, dimensional scene—complete with realistic lighting, depth cues, and chromatic energy that evokes imagination, creativity, and possibility.
Designers, marketers, educators, and small business owners use it for social media banners, course landing pages, podcast cover art, presentation headers, and even print-ready promotional materials. The “colorful” part isn’t decorative fluff—it’s intentional: soft pastel gradients blend with saturated highlights, and subtle texture overlays prevent digital harshness. That balance is why it stands out from generic 3D mockups that lean too heavy on neon or metallic effects.
Assuming It Works Out of the Box—Without Checking Compatibility
One of the most common oversights? Opening the Dreams - Colorful 3D Text Effect Mockup in an older version of Photoshop—or worse, in a non-Adobe editor—and assuming the layers will behave as expected. The mockup relies on Smart Objects, layer styles (like Bevel & Emboss with contour maps), and adjustment layers with blend-if settings. If your software doesn’t support those features—or if you’re using Photoshop Elements instead of full Creative Cloud—you’ll see flattened layers, missing effects, or broken smart links.
This doesn’t mean the file is flawed. It means expectations weren’t aligned with technical reality. A designer who downloads it for a client pitch on a shared laptop running Photoshop CS6 may waste 45 minutes troubleshooting layer visibility before realizing the issue is version-related—not user error.
Better approach: Before downloading or purchasing, check the listed system requirements—not just “Photoshop required,” but the minimum version (usually CC 2020 or newer). Open the preview file in your own workspace first. Try renaming the placeholder text layer and updating it with your own font. If the 3D effect stays crisp and editable, you’re good to go.
Overlooking Font Licensing and Readability Trade-offs
The mockup includes beautifully rendered sample text—but that’s just for demonstration. When you swap it in, many users instinctively choose bold, decorative fonts to match the energy of the effect. That’s understandable… until the text becomes hard to read at smaller sizes or across devices. A playful script font may look stunning on a desktop hero banner but vanish into illegibility on mobile or in email clients.
Also, not all fonts are licensed for commercial use—even if they’re free to download. Using an unlicensed font inside a client deliverable (e.g., a branded Instagram post) can create legal exposure, especially for freelancers and agencies.
What to do instead: Stick with system-safe or open-license fonts like Inter, Manrope, or Poppins for body or subhead text. Reserve expressive fonts for single-word headlines—then test them at 75%, 50%, and 33% of their original size. And always verify licensing: Google Fonts and Adobe Fonts provide clear usage terms; sites like DaFont require careful review of each font’s license badge.
Ignoring Lighting Direction and Background Harmony
The Dreams - Colorful 3D Text Effect Mockup includes carefully balanced light sources—soft top-left key light, gentle ambient fill, and subtle rim highlights. But when users drop in their own background image or color, they sometimes forget to match lighting direction or tone temperature. Placing warm-toned text over a cool-toned gradient creates visual dissonance. Or aligning text so its shadow falls *upward* while the background’s shadows fall downward breaks spatial logic.
That mismatch won’t get flagged by spellcheck—but it quietly undermines professionalism. Viewers may not know why something feels “off,” but they’ll sense inconsistency. In branding work, that hesitation can dilute message clarity or perceived credibility.
Solution: Use the mockup’s built-in background layers as a reference—not just a canvas. Note where highlights land on the sample text. Then adjust your background’s brightness curve or hue/saturation to echo that same direction and warmth. Even rotating your background layer 2–3 degrees to match the mockup’s implied light angle helps ground the composition.
Skipping the Real-World Output Test
It’s easy to fall in love with how something looks on screen—especially with rich color and depth. But the Dreams - Colorful 3D Text Effect Mockup is rarely used only on retina displays. Think about where your final output lands: a printed flyer, a Facebook ad thumbnail, a dark-mode app interface, or a projected slide. Each context changes contrast perception, saturation rendering, and fine-detail visibility.
For example, the delicate inner glow effect may disappear entirely when compressed for web use—or invert strangely in dark mode if not manually adjusted. One educator created workshop slides using the mockup’s default settings, only to discover students couldn’t read the title text during a Zoom presentation due to low contrast against the exported JPG background.
Practical fix: Export two versions: one optimized for screen (sRGB, medium compression), and one for print or high-fidelity display (CMYK or ProPhoto RGB, uncompressed TIFF). Then view both on multiple devices—including an older smartphone and a laptop in daylight. If the text remains legible and the color story intact across all, you’ve stress-tested it well.
Buying Without Previewing the Layer Structure
Not all mockups are built the same—even within the same category. Some lock critical effects into rasterized layers. Others bury editable controls inside nested groups with unclear naming. With the Dreams - Colorful 3D Text Effect Mockup, the value lies partly in how thoughtfully organized and labeled the layers are: “Your Text Here (Editable),” “Lighting Control (Adjustment Layer),” “Color Shift (Hue/Saturation),” etc.
If you skip reviewing the layer panel in the preview video or screenshot, you might assume customization is simple—only to find yourself digging through ten unnamed shape layers trying to isolate the bevel effect.
Before committing: Watch the author’s walkthrough video (if available), or download the free preview file. Expand the Layers panel. Look for grouped sections, layer masks, and Smart Object indicators. If everything is clearly named and non-destructive, you’ll save time—and frustration—down the line.
Ultimately, the Dreams - Colorful 3D Text Effect Mockup shines when treated as a thoughtful tool—not a magic button. It rewards attention to detail, respects your workflow, and lifts your typography without asking you to rebuild physics from scratch. Choose wisely, test early, and let the color and dimension serve your message—not distract from it.