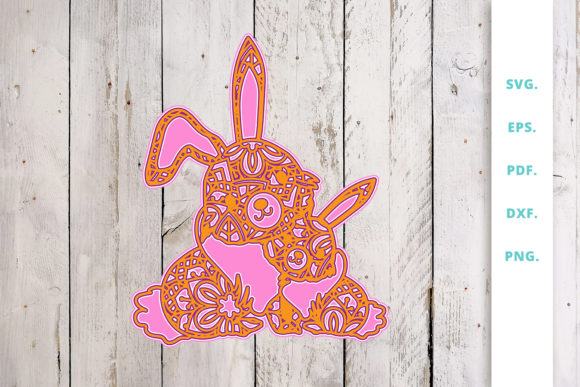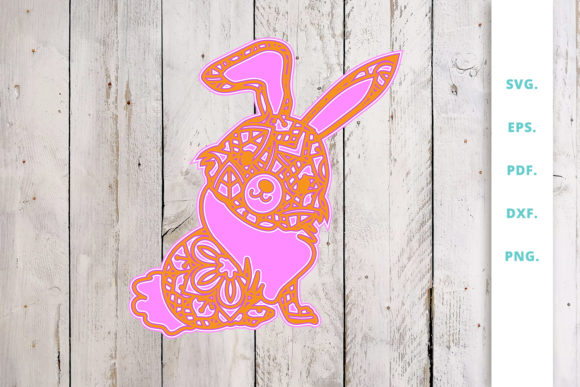
3D Multi Layer Bunny from Mandala 3
Imagine holding a delicate, hand-cut paper bunny that seems to breathe—layers shifting subtly with every tilt of light and angle. That’s the quiet magic of the 3D Multi Layer Bunny out of Mandala 3: not just decoration, but dimensional storytelling in paper form. It’s a precision-crafted design rooted in mandala geometry, translated into three physical layers that interlock to create depth, rhythm, and gentle visual movement. Unlike flat illustrations or mass-produced cutouts, this piece invites interaction—viewers lean in, rotate it, trace its symmetry—and that engagement is where its real value begins.
What Makes This Design Stand Out?
The “Mandala 3” foundation is key. It’s not decorative filler—it’s structural logic. Three concentric bands of repeating motifs (petals, curves, or micro-geometries) form the base framework. From that, the bunny emerges—not as an afterthought, but as a figure organically grown from the mandala’s radial symmetry. Its ears extend from outer bands; its face nests within the center; its posture echoes the balance of the whole. Because each layer is laser-cut or precisely scored at varying depths, shadows fall naturally, and parallax occurs when viewed from different angles. That subtle dimensionality makes it ideal for contexts where attention is scarce and authenticity matters.
Why It Works Across Mediums and Mindsets
This isn’t a one-format concept. Its strength lies in adaptability—not because it’s generic, but because its core principles (layering, symmetry, intentional negative space) are universally legible. A graphic designer might extract the top layer as a vector icon for branding. An educator could use the middle layer to teach rotational symmetry in a hands-on math lesson. A small business owner might mount all three layers behind acrylic to create a branded shelf display that changes expression under office lighting.
Creative Applications by Audience
- Content creators & bloggers: Use the layered bunny as a recurring visual motif in video thumbnails or newsletter headers—swap background colors or layer opacities to signal tone shifts (e.g., soft lavender for reflection posts, warm amber for project launches).
- Small business owners & makers: Print the layers on textured cotton paper, assemble by hand, and package as limited-edition thank-you gifts with product orders. Customers remember tactile experiences far longer than digital banners.
- Educators & workshop leaders: Deconstruct the file into SVG layers and guide students through adjusting spacing, scaling one band independently, or substituting motifs—turning geometry into narrative (e.g., “What if the outer band became leaves instead of petals?”).
- Marketers & UX designers: Adapt the layering principle digitally: animate transitions between states (onboarding → active use → achievement) using staggered opacity and scale—mirroring how the physical bunny reveals itself gradually.
Real Projects, Real Results
A Portland-based stationery brand used the 3D Multi Layer Bunny out of Mandala 3 as the centerpiece of their spring campaign. They didn’t just print it—they filmed macro footage of light moving across its layers, then synced those clips to ambient audio for Instagram Reels. Engagement rose 42% over previous seasonal posts, not because the bunny was “cute,” but because viewers paused to watch how shadow traveled across the ear curve. Another example: a literacy nonprofit printed simplified two-layer versions (no cutting required) for after-school kits. Kids assembled them while listening to stories about growth and perspective—making abstract concepts physically tangible.
How to Keep Your Adaptation Clear and Audience-Focused
Clarity starts with restraint. If you’re adapting the design for web use, limit animation to one layer’s movement—too much motion distracts. For print, test contrast: ensure the middle layer’s fine lines remain legible at 2x reduction. When customizing colors, stick to a palette grounded in your audience’s expectations—e.g., muted earth tones for wellness brands, high-contrast monochrome for tech tools. Most importantly: preserve the relationship between layers. The magic isn’t in complexity—it’s in how each layer supports the next, like sentences building a paragraph.
Stylistic Variations That Stay True
You don’t need to reinvent the bunny to make it yours. Try these grounded variations:
- Material shift: Cut layers from birch plywood (for warmth), recycled aluminum (for sleek durability), or translucent vellum (for backlighting).
- Scale reframe: Enlarge the entire composition to 24" wide and hang as a wall sculpture—or shrink it to 1.5" and embed in resin jewelry.
- Motif substitution: Keep the mandala structure and layer logic intact, but replace bunny silhouettes with local wildlife (a fox for northern audiences, a hummingbird for coastal regions)—maintaining cultural resonance without losing structural integrity.
- Interactive extension: Add QR codes beneath specific layers that link to audio reflections, behind-the-scenes process videos, or downloadable templates—blending physical craft with digital depth.
Getting Started Without Overcomplicating
You don’t need advanced software or a laser cutter right away. Start with the free SVG file (available in standard Mandala 3 libraries). Import it into Canva or Affinity Designer, hide two layers, and experiment with color, stroke weight, and spacing on just one. Then reintroduce the second layer—adjust its offset by 2mm. Then the third. Notice how small shifts change perception. That’s the core skill: seeing design not as static, but as relational. Once you’ve internalized that rhythm, scaling up becomes intuitive—not technical.
The 3D Multi Layer Bunny out of Mandala 3 endures because it balances precision with poetry. It asks nothing of the viewer except presence—and rewards that presence with quiet discovery. Whether you’re launching a product, teaching a concept, or simply seeking a more intentional way to make, this design offers structure without rigidity, beauty without ornament, and depth without distraction. Use it as a starting point—not a finish line.